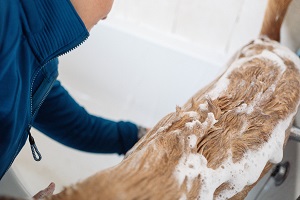
Creating a homemade dog dryer can be a fulfilling project that provides a convenient and cost-effective way to keep your furry friend clean and comfortable. While making a functional dog dryer requires some technical knowledge and basic skills, it can be a rewarding endeavor.
Here’s a step-by-step guide on how to make a DIY dog dryer.

Materials Needed
Before making a dog dryer, we must prepare the following material needed.
Blower Fan
A high-quality blower fan with adjustable speed settings will be the heart of your homemade dog dryer.
Heating Element (Optional)
If you want to add warmth to the airflow, a heating element can be incorporated. Ensure it’s safe and suitable for your pet.
Nozzle or Diffuser Attachment (Optional)
To evenly distribute the airflow, you can use a nozzle or diffuser attachment.
Insulated Wire
Choose a wire that’s suitable for electrical connections, and ensure it’s properly insulated for safety.
Power Cord
A power cord with a plug will provide the necessary connection to the electrical outlet.
Switch
An on/off switch allows you to control the dog dryer conveniently.
Step-by-Step Instructions
After preparing the material needed,you can craft a dog dryer according to the following steps.
1. Design and Planning
Determine the size and design of your dog dryer based on the materials you have and your pet’s needs. Consider safety, airflow, and comfort while planning.
2. Gather Components
Collect all the required components mentioned above. Ensure they are of good quality and meet safety standards.
3. Prepare the Housing
Choose or create a housing for your dog dryer. This could be a sturdy plastic box or a custom enclosure made from materials like plywood.
4. Mount the Blower Fan
Position the blower fan inside the housing. Secure it in place using brackets or screws.
Ensure the fan is oriented to blow air outward.
5. Add Heating Element (Optional)
If you’re incorporating a heating element, carefully install it according to the manufacturer’s instructions. Ensure proper insulation and wiring.
6. Attach Nozzle or Diffuser (Optional)
For even airflow distribution, attach a nozzle or diffuser to the outlet of the blower fan. This helps prevent concentrated blasts of air.
7. Wire the Components
Connect the blower fan, heating element, switch, and power cord using insulated wires. Ensure proper connections and secure them with wire connectors.
8. Install the Switch
Mount the on/off switch in a convenient location on the housing. This allows you to control the dog dryer’s operation easily.
9. Safety Checks
Double-check all connections, wires, and components to ensure they are secure and properly insulated. Safety is paramount when dealing with electrical components.
10. Test the Dryer
Before using the dog dryer on your pet, test it to ensure all components are functioning correctly. Check both the blower fan and, if applicable, the heating element.
11. Use and Supervision
When using the homemade dog dryer on your pet, do so with caution and supervision. Start with a low airflow setting and monitor your pet’s response. Always prioritize their comfort and safety.

Conclusion
Remember that creating a homemade dog dryer requires technical knowledge and adherence to safety standards. If you’re unsure about any aspect of the process, it’s advisable to consult professionals or experts in electronics.
A homemade dog dryer can be a unique and useful tool, but ensuring your pet’s well-being should always be the top priority.
